What is this
Since I only have an XBox One controller and that controller does not have gyro capability, it is very hard for me to play Zelda BOTW. Some shrines in BOTW require to use gyro. There are other options like using a PS4 or PS5 controller or use your Android phone as a gyro device but I like when everything work on one device so it does not feel “hacky”. I did not test how fluent SteamDeck run BOTW natively, but I am using Sunshine and Moonlight to stream CEMU from my much more powerful PC.
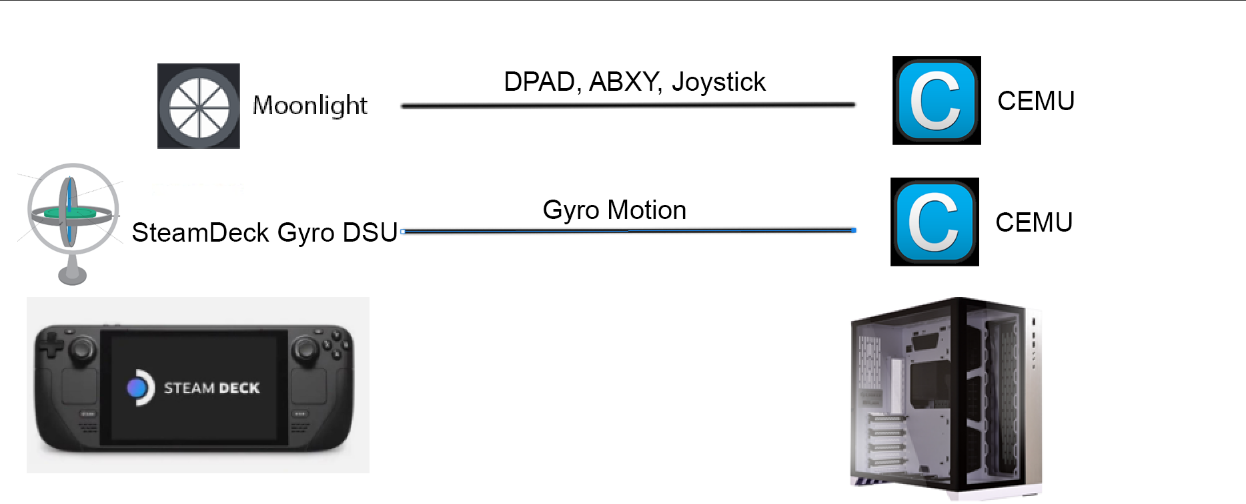
How it works
Rendering is done on your PC. Basic control and gyro motion are passthru from your SteamDeck to your PC. This works because of the following:
- SteamDeckGyroDSU will host a very lightweight server on your SteamDeck and that server is used to transmit gyro motion to your PC Cemu emulator.
- Your normal control, like DPAD, ABXY, and Joystick are passthru via Moonlight
If you have not setup Moonlight and start rendering game from your pc, you should definitely set it up Sunshine Moonlight and Moondeck Buddy
Setup
You will need to get Moonlight working first before following this guide. Moonlight is a streaming application and you cant see anything from your PC without streaming, so set that up first Sunshine Moonlight and Moondeck Buddy
SteamDeckGyroDSU (SteamDeck)
This portion require SteamDeck Desktop mode, a tiny bit of terminal interaction, and you should also already have sudo password set.
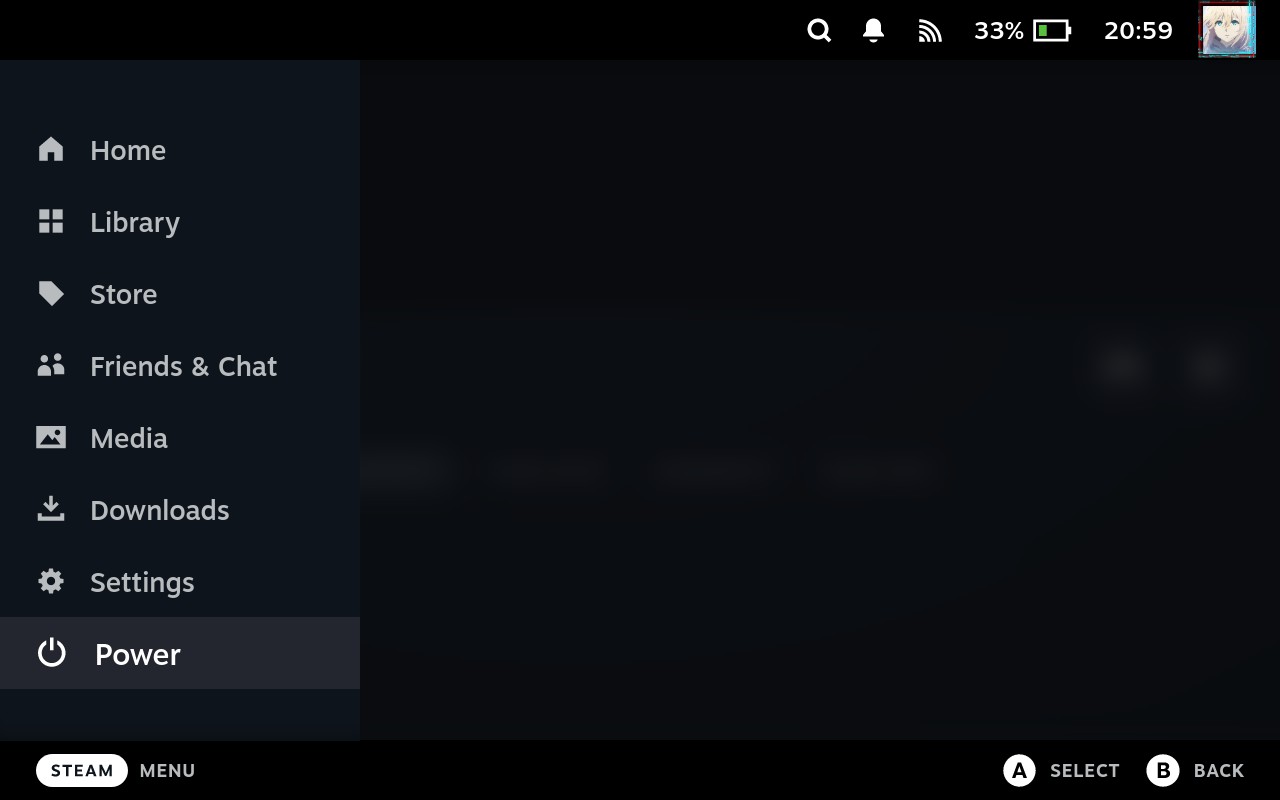
Go to Desktop
- Press on Steam button on left hand side of your SteamDeck (below trackpad), then go to Power
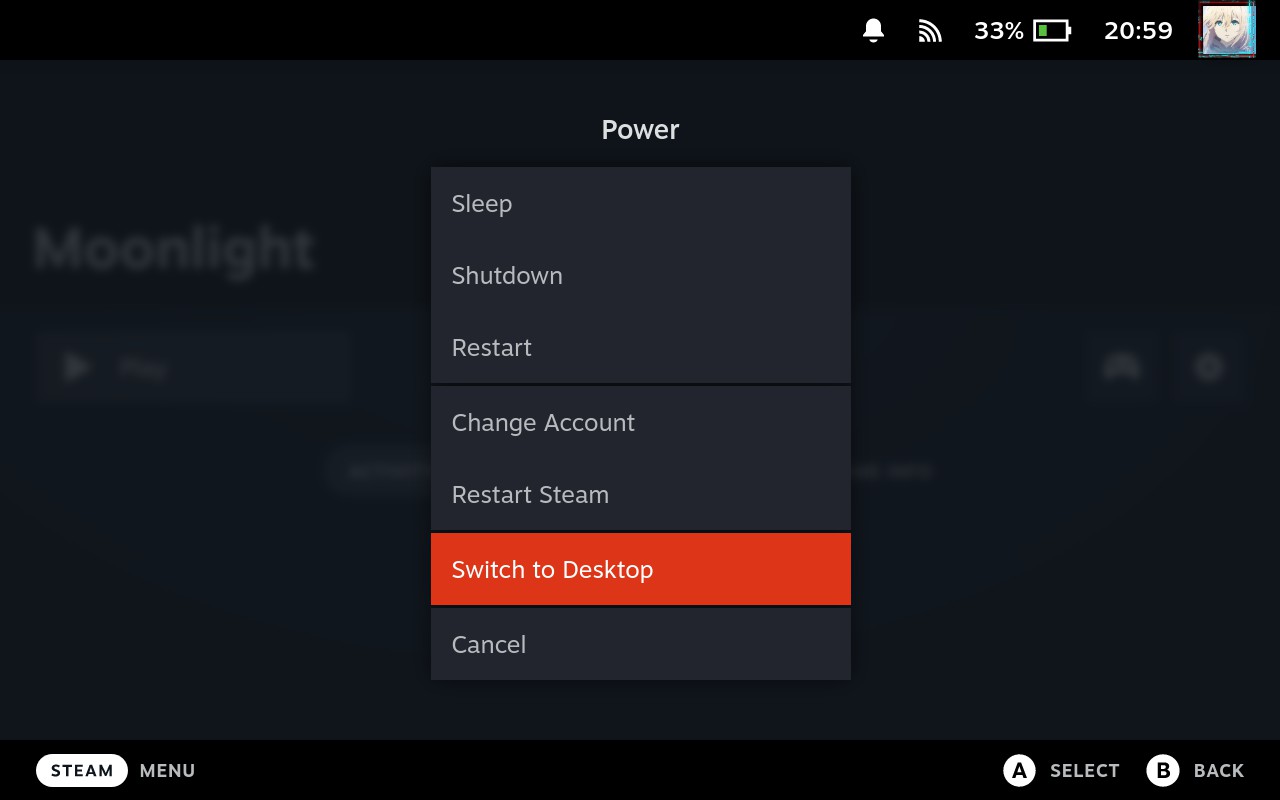
- Select Switch to Desktop
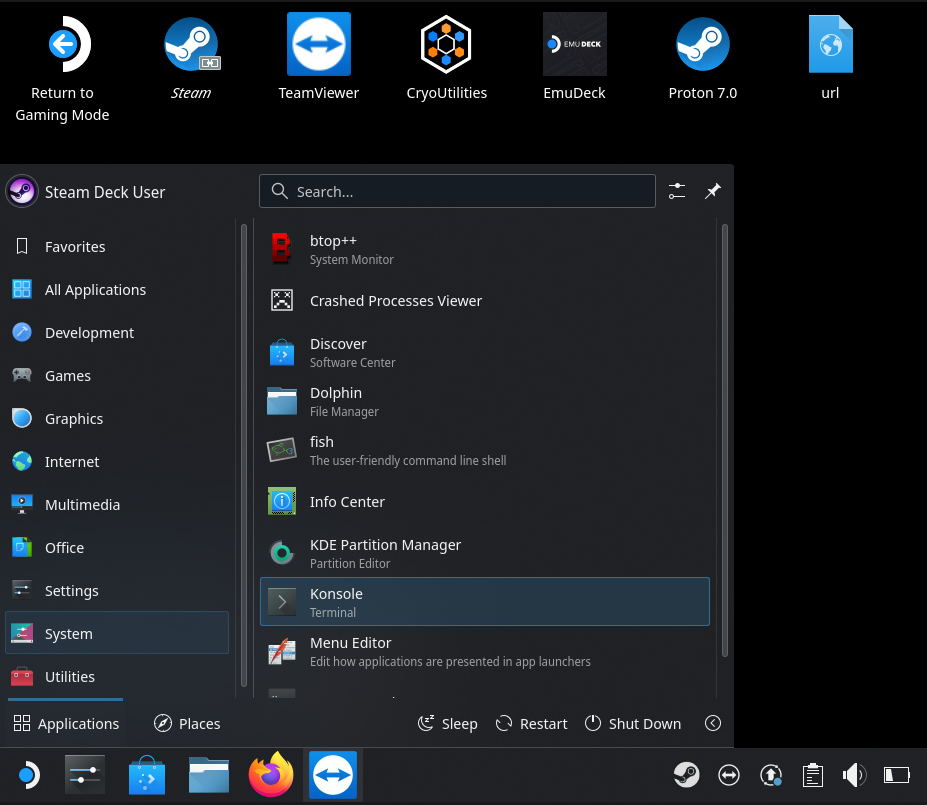
Open Konsole Terminal
You can click on bottom left corner start menu, then System - Konsole
Set sudo password for user deck
Open up a Konsole terminal, and type in
passwdThen it will prompt you to set a new password
- Since I already set a password for user
deck, it will ask current password before setting a new password.- If you see it asking for your current password then you already have a
sudopassword set.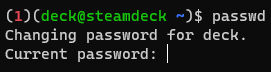
DO NOT FORGET THIS PASSWORD, YOU WILL GO THROUGH PAIN IF YOU FORGET THIS
- If you see it asking for your current password then you already have a
Install GyroDSU
This is a plugin you can either get from SteamDeckGyroDSU (follow their official README.md guide) or if you have EmuDeck already installed, you can launch EmuDeck installer and install from there.
Github method
Just follow their README.md. If you are not very technical, just use the EmuDeck method, it is a bit easier.
Emudeck method
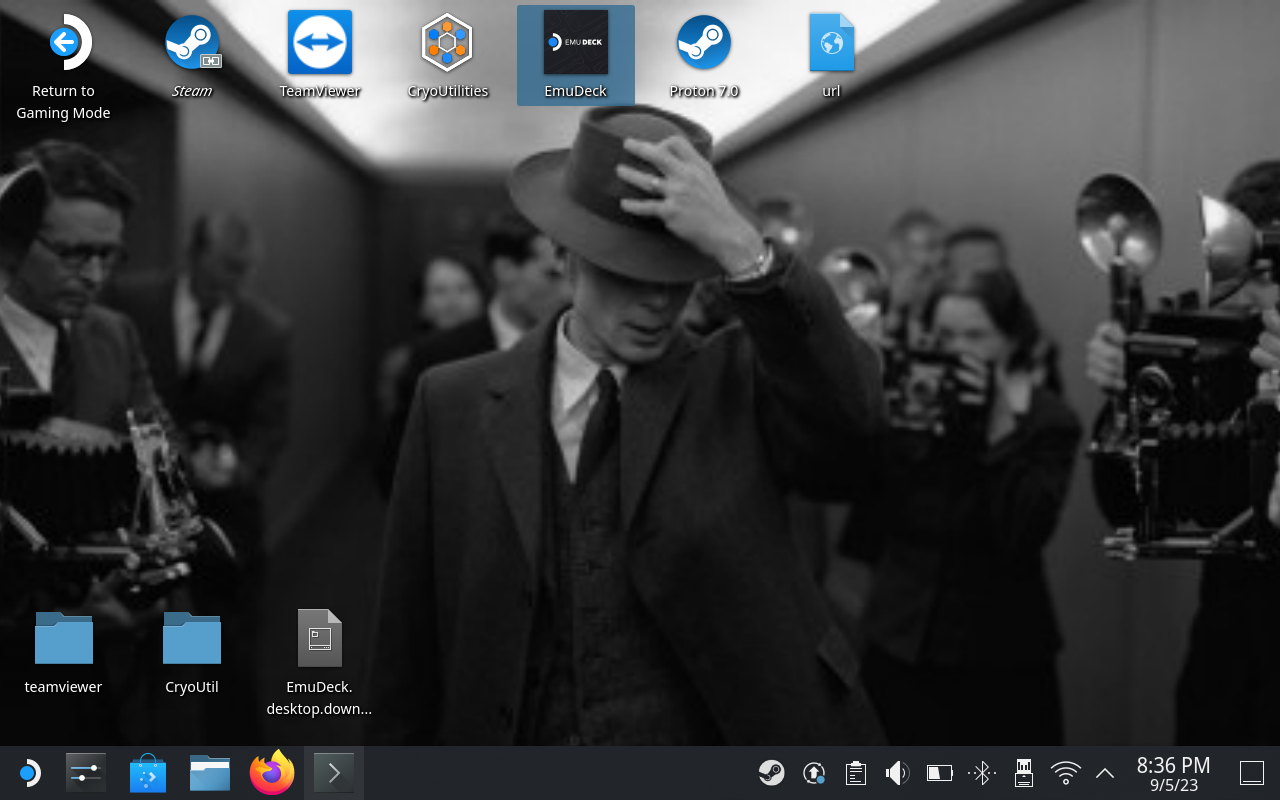
- Start EmuDeck from your desktop, if you dont have this icon, you can download from EmuDeck website
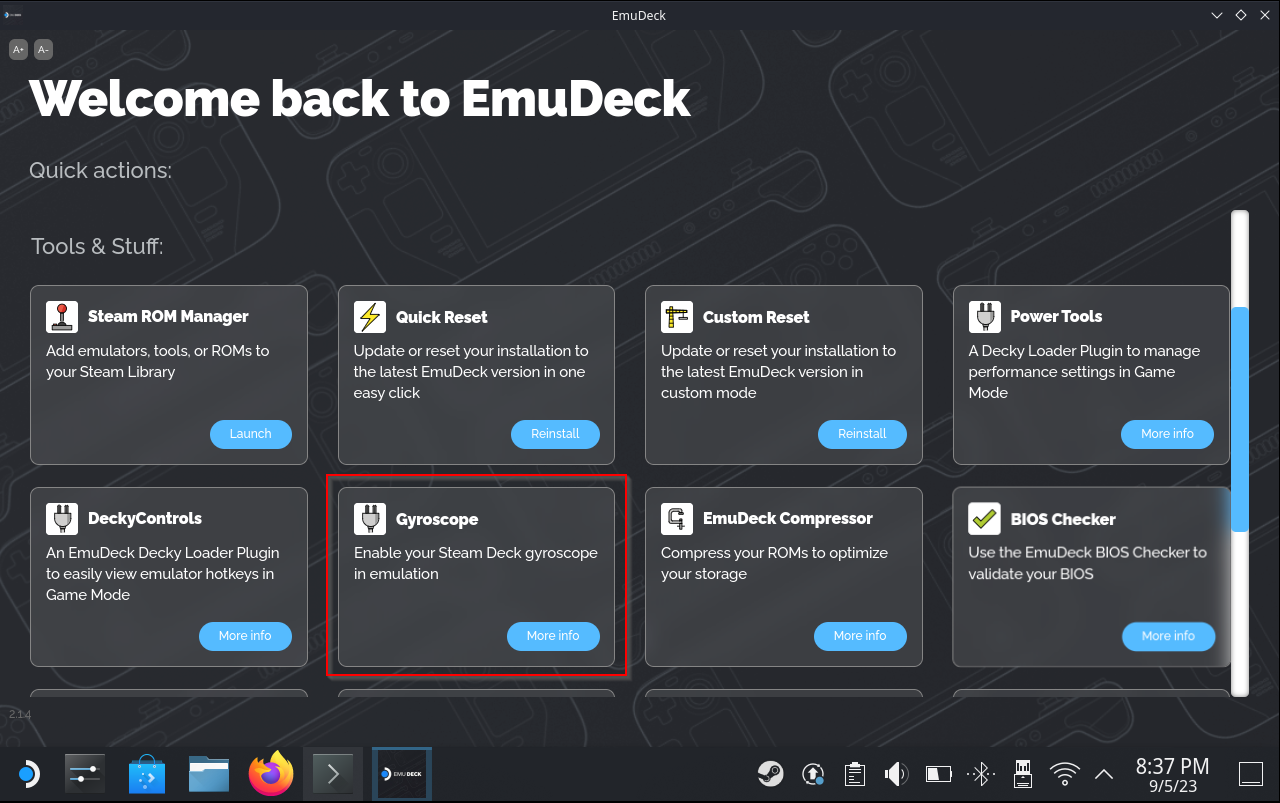
- Once you (re)install EmuDeck, start EmuDeck and in main dashboard, locate Gyroscope and click on More Info
- You will need to set a
sudopassword for userdeckif you have not done so already. Set sudo password for user deck - Then you can enter the
sudopassword you just created into this prompt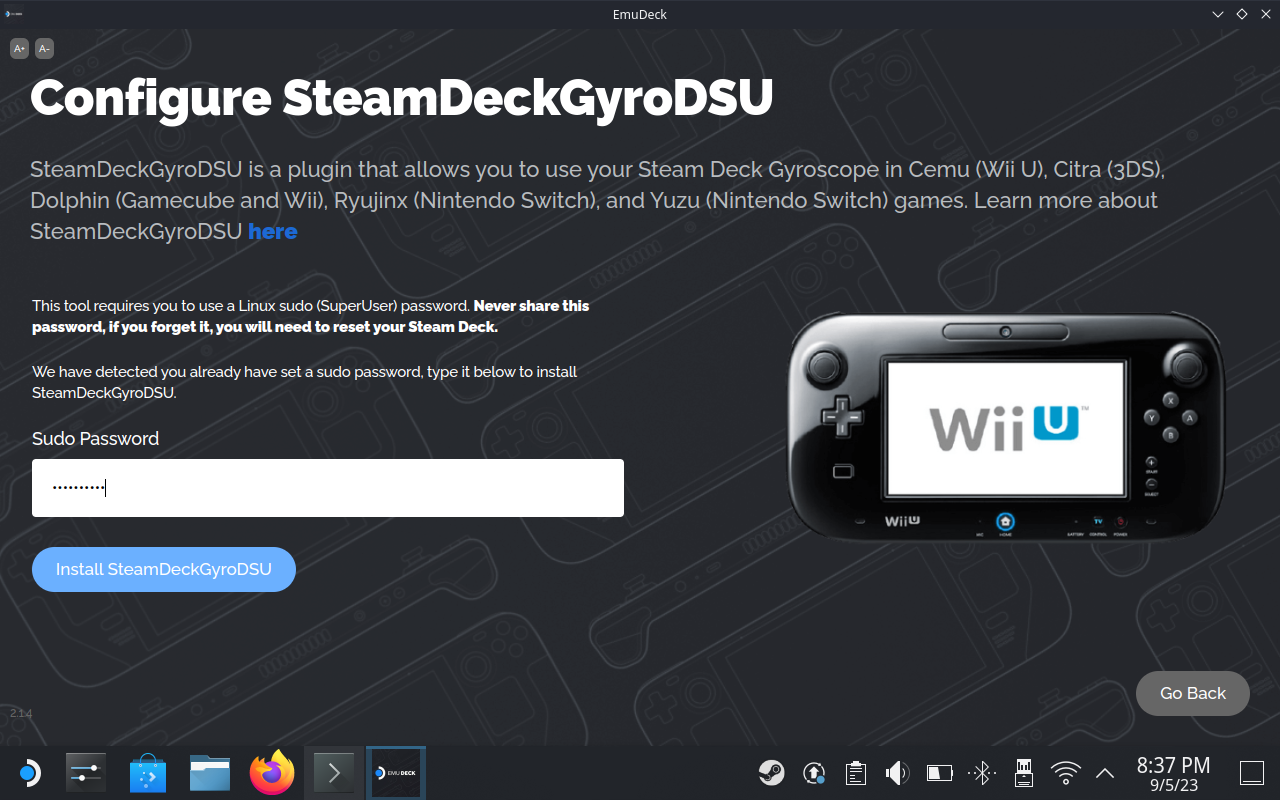
- Then you will see a terminal shell will open, just let it run
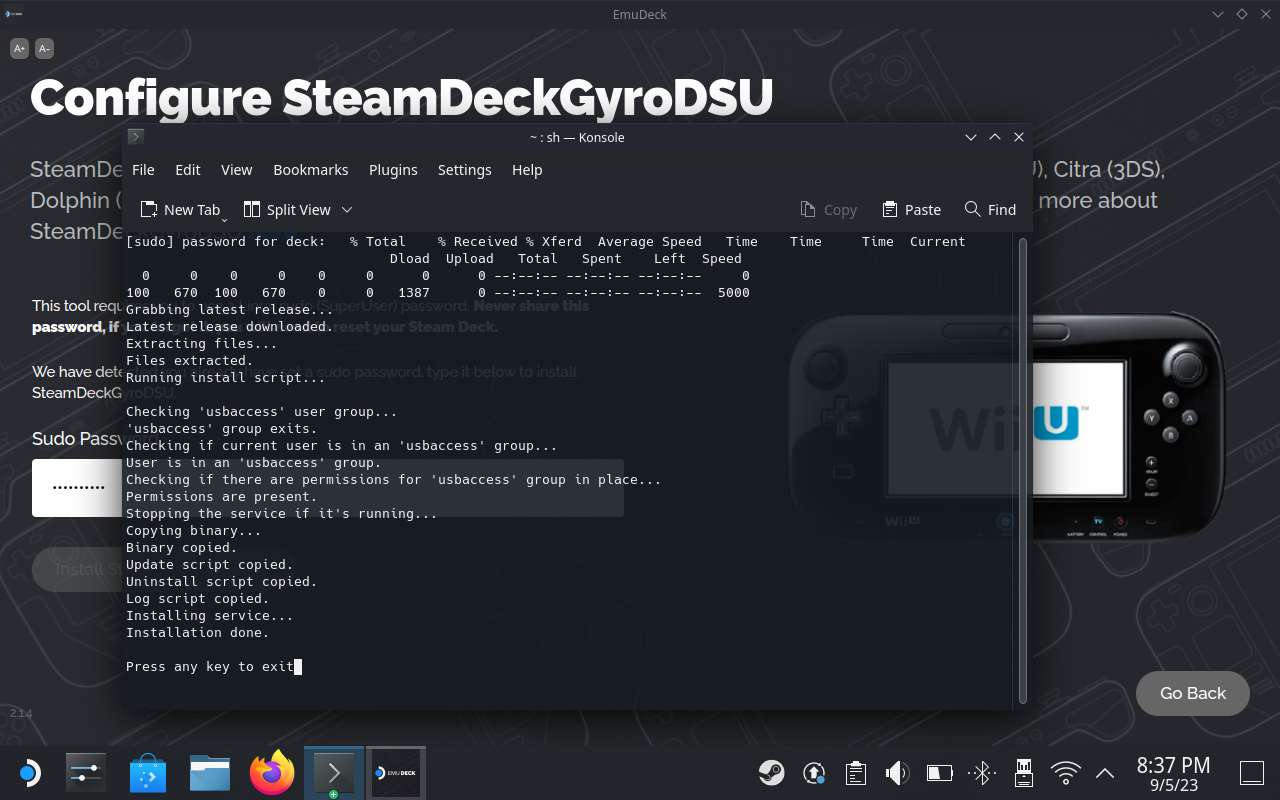
- Once you see Installation done, then you can close this terminal. DO A SYSTEM RESTART even though this screenshot does not prompt me for restart, it did prompt me the first time I install this plugin.
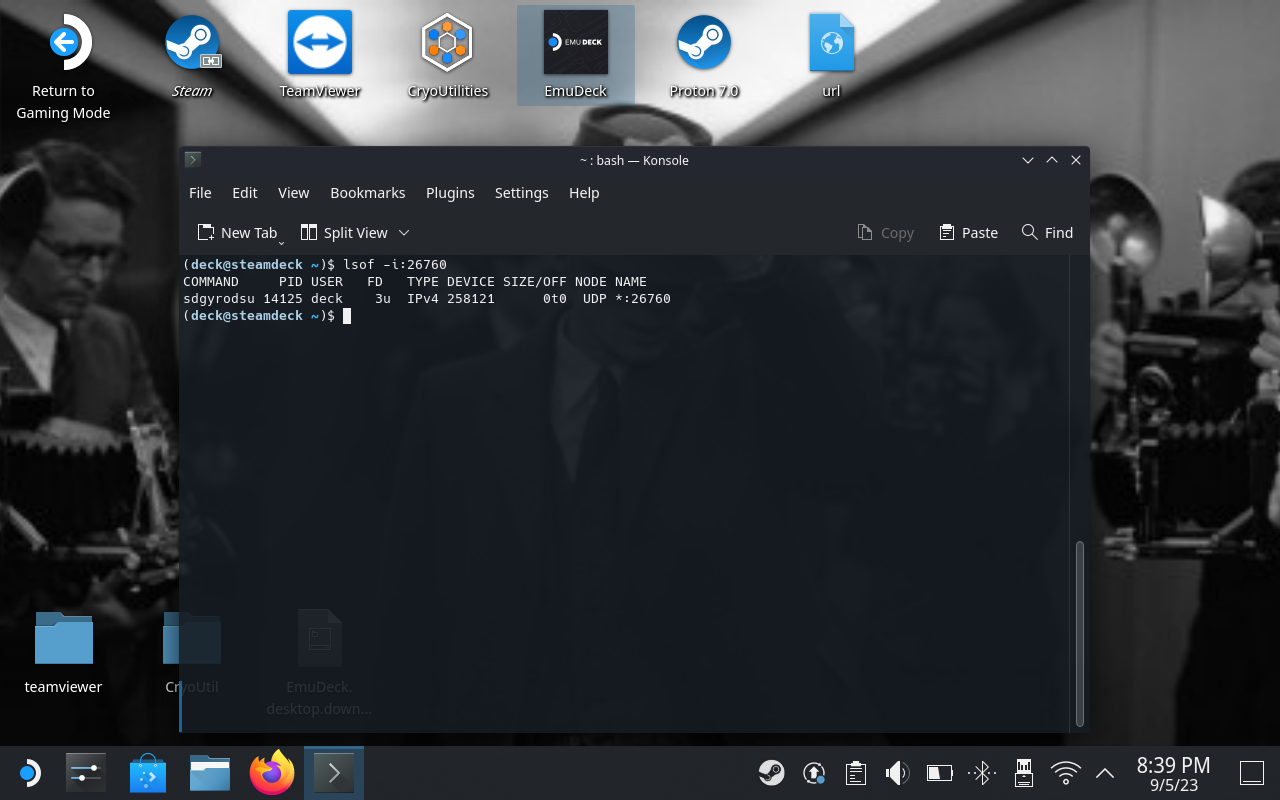
- Once you restart your SteamDeck, go back to Desktop mode, open a Konsole terminal and type in this command:
lsof -i:26760- This command will show that GyroDSU is running and it is running on port 26760. We will connect to this port on our PC Cemu. This service will be running even when we go to Game Mode or restart SteamDeck
Uninstall GyroDSU
If you ever want/need to uninstall GyroDSU, you can use this command from their official Github Repo
$HOME/sdgyrodsu/uninstall.shEnable Gyro (SteamDeck)
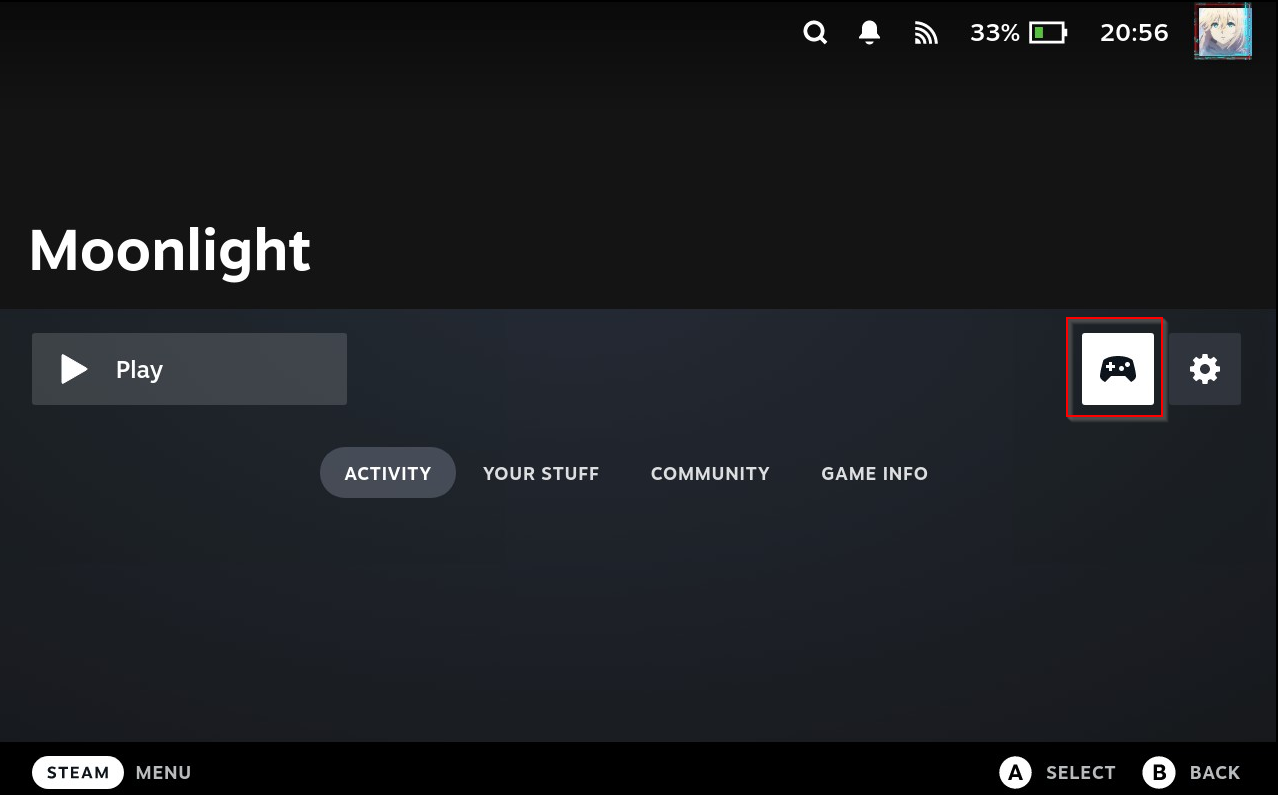
Now that our GyroDSU service is running properly, we can return to SteamDeck’s game mode, launch Moonlight shortcut and configure Game Layout
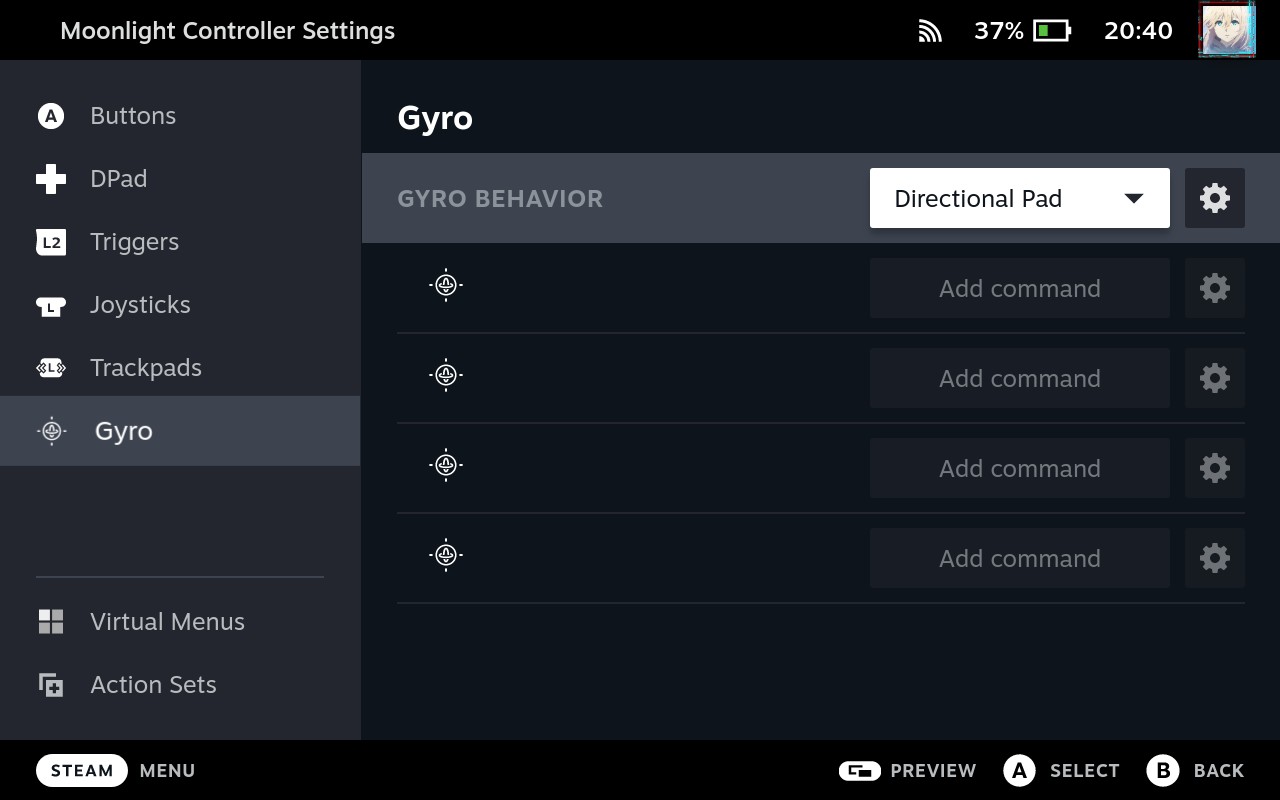
- Go to Moonlight shortcut, click on the game pad, this button is for configuring layout
- Click on Edit Layout
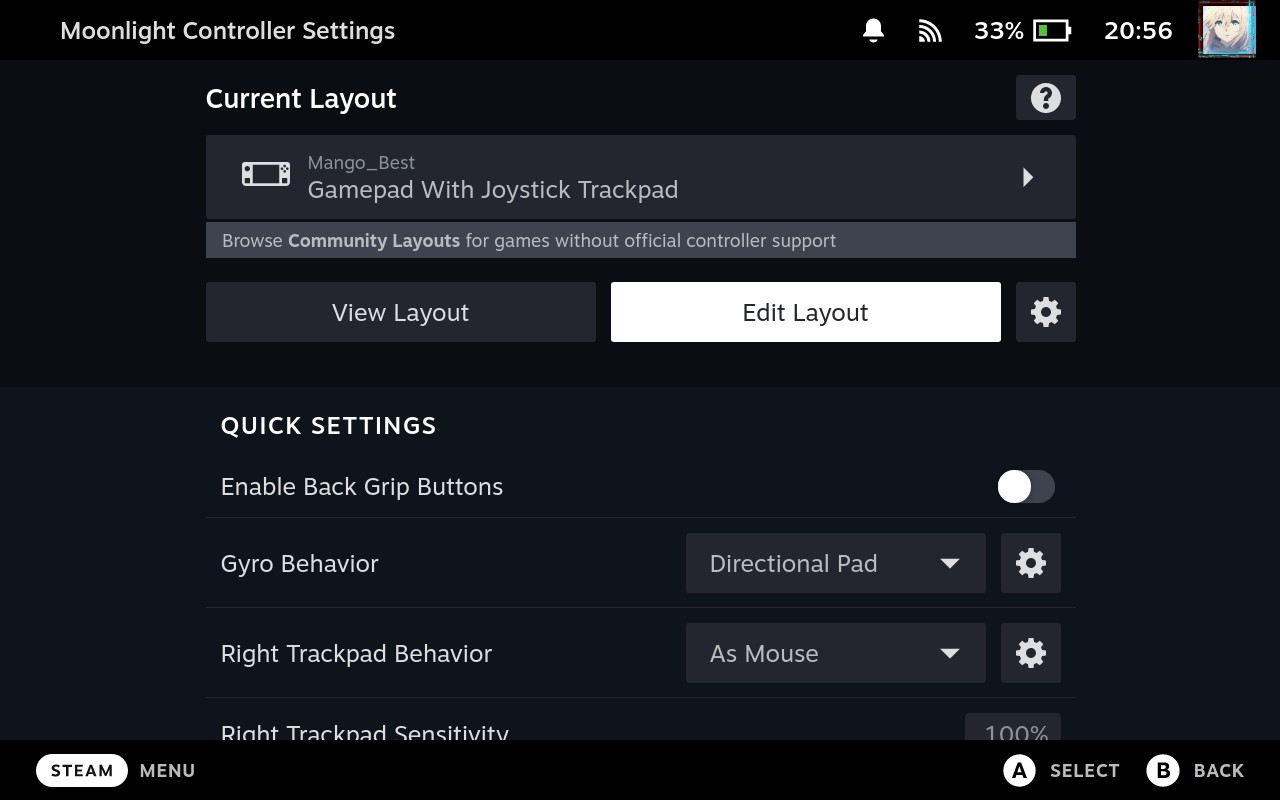
- Go to Gyro tab and enable Directional Pad This needs to be Directional pad otherwise it will not work
Get SteamDeck LAN IP address (SteamDeck)
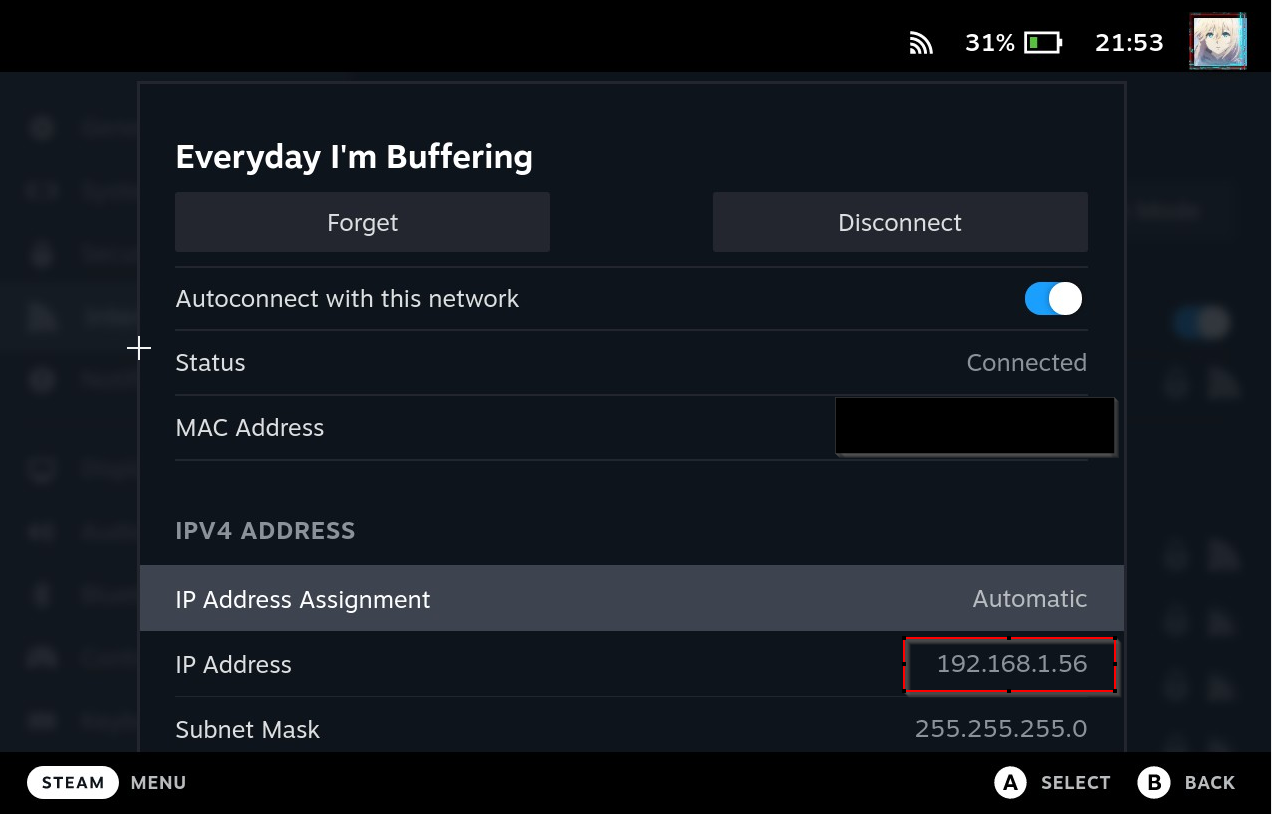
- We will need to get SteamDeck local network IP address in order for Cemu to connect.
- You can go to
Setting->Network-> Select your WIFI - No worry, this is local only, no one will hack you by obtaining this IP… just want to point this out
CEMU (PC)
We will now configure Cemu emulator on PC
- Open up
Cemu,Options->Input settings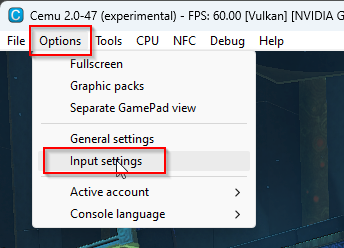
- Under
Controller 1profile, you want to setup anemulated controllerofWii U GamePad. OnlyWii U GamePadsupport gyro motion - Then in Controller (this is your actual physical controller) we will setup basic control first
Note, YOU MUST CONFIGURE THE CONTROLLERS IN THIS ORDER, REVERSE ORDER WILL MAKE GYRO NOT WORK
XINPUT FIRST, THEN GYRO/DSUController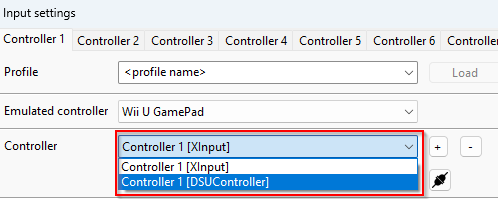
XINPUT
We will need to get basic key mapping into Cemu, and surprisingly, Cemu allow you to use multiple controller input on the same controller profile (one for basic control and one for gyro)
YOU WILL NEED TO LAUNCH MOONLIGHT INORDER FOR CEMU TO DETECT STEAMDECK BASIC CONTROL
- Click on the plus button and add a
XINPUTAPI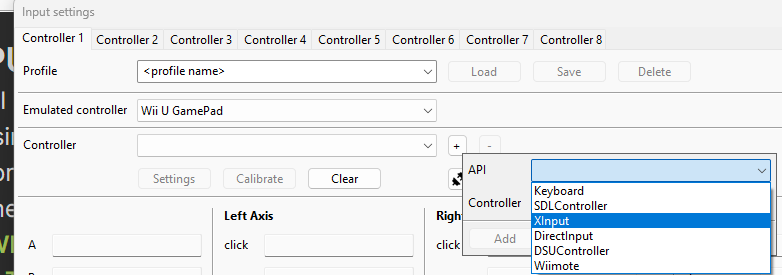
- It will say
Controller 1, select and Add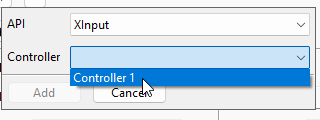
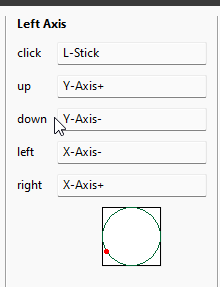
- There you go, all your basic mapping should be here, change A/B X/Y accordingly. If you move your joystick, the red dot should be moving accordingly
Note, you can only change your basic control mapping in XINPUT, If you trying to change basic control in Gyro/DSU controller it will have basic key mapping grayed out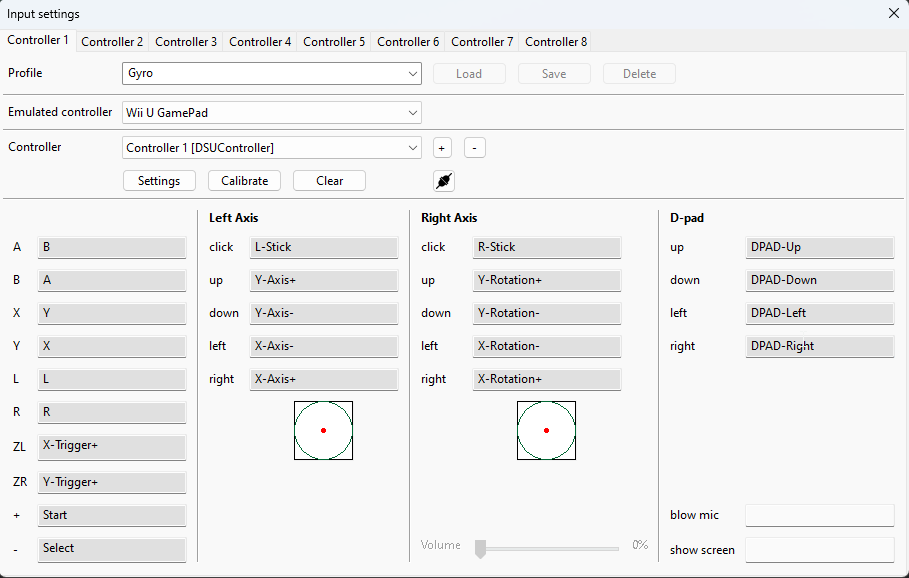
DSUController
- Click on the plus icon next to the drop down, and select API
DSUController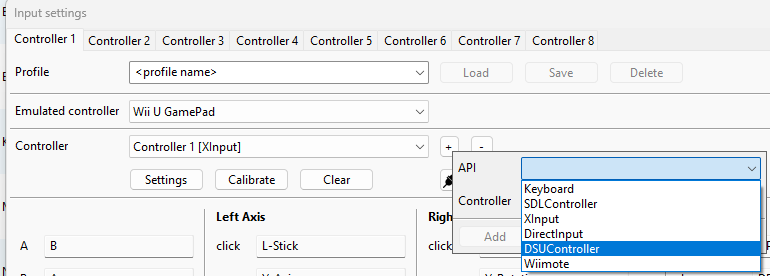
- Change the IP to your SteamDeck IP, for me it is
192.168.1.56 - After a brief moment,
Controller 1(SteamDeck’sGyroDSU) will show up
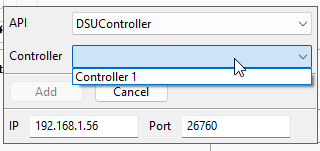
- Select
Controller 1and click Add - Then while you still have
Controller 1 [DSUController], clickSetting->Use Motion, then Ok At this point Gyro is working and we should be able to move around from tilting our SteamDeck, you also got basic control from XINPUT
 - Give this controller a name and save
