Prefix
-
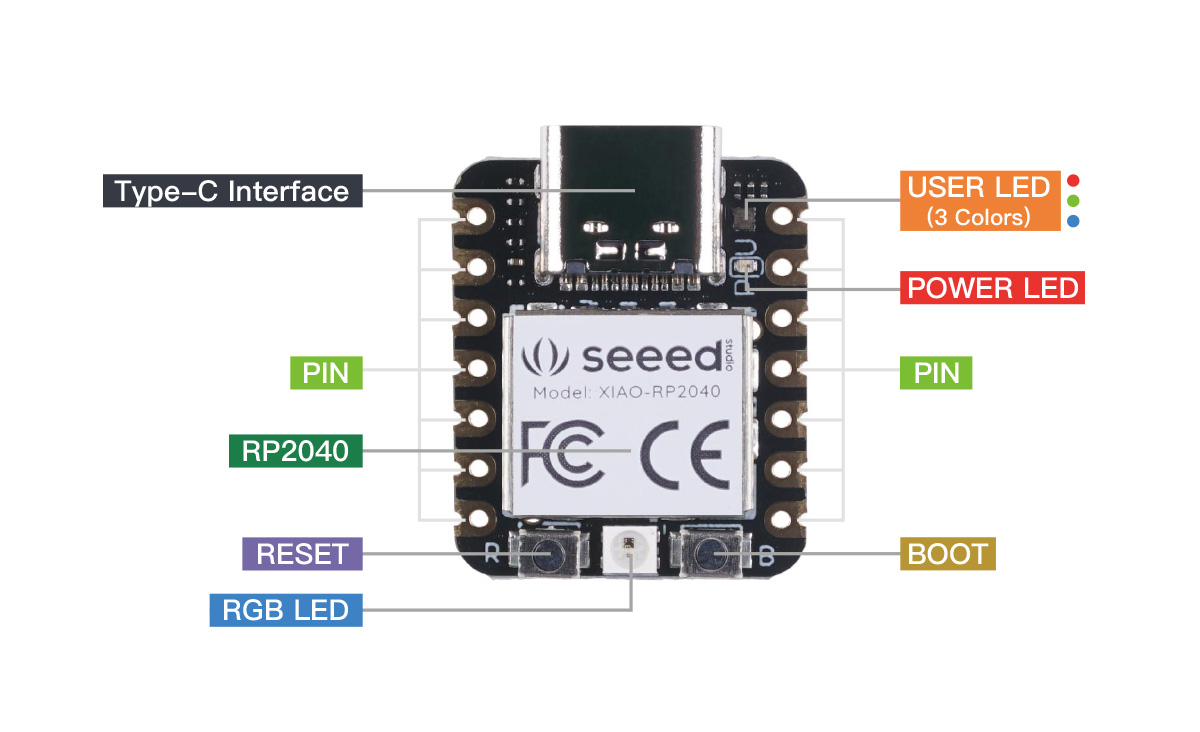
Xiao RP2040 is a microcontroller roughly size of a MX switch with massive storage space
- python code can be place inside storage without compiling (unlike QMK and ZMK) makes updating keymap easier and more accessible (no toolchain required).
- Easy to update keymap in
main.py, configuration written in Python, easy to understand and modify
-
Using CircuitPython as base firmware.
-
KMK is a library on top of CircuitPython. This library makes programming keyboard keycode and other features easy.
You will need the following software
- WinCompose for Unicode support on Windows
- MU Editor or VSCode for editing code (notepad++ or even notepad would work)
- Putty if you need to connect via COM port and see debug message
Initial setup
The following setup only need to do once. If you got a working board already, you dont need to do this part. Skip to Editor to setup editor or skip to User Configuration to start configuring your keymap.
Flashing CircuitPython base firmware .uf2
You probably dont need this, but in an event your firmware corrupts, use this to reflash your firmware.
-
Go to CircuitPython page for XIAO RP2040, and download the
.uf2file
-
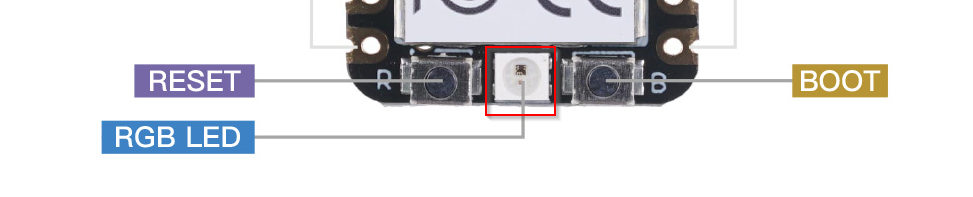
Hold the BOOT button (located on bottom right of the controller with a letter B) then plug in USB-C cable to your XIAO RP2040 microcontroller

-
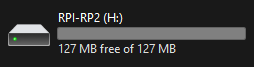
Controller will be recognize as a USB storage, place your .uf2 file inside and the controller will immediately reboot
-
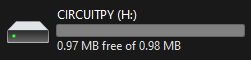
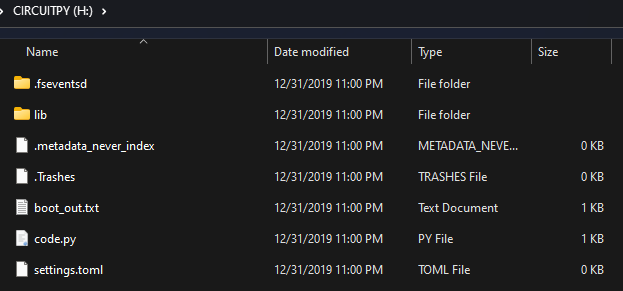
Now your drive will be named CIRCUITPY and storage drop to 0.98MB and drive filled with CircuitPython libraries
Add KMK library
You only need to do this once, and when update KMK library.
-
Go to my KMK github which is a fork of official KMK with a few tweaks. Cilck on Code tab and download as ZIP
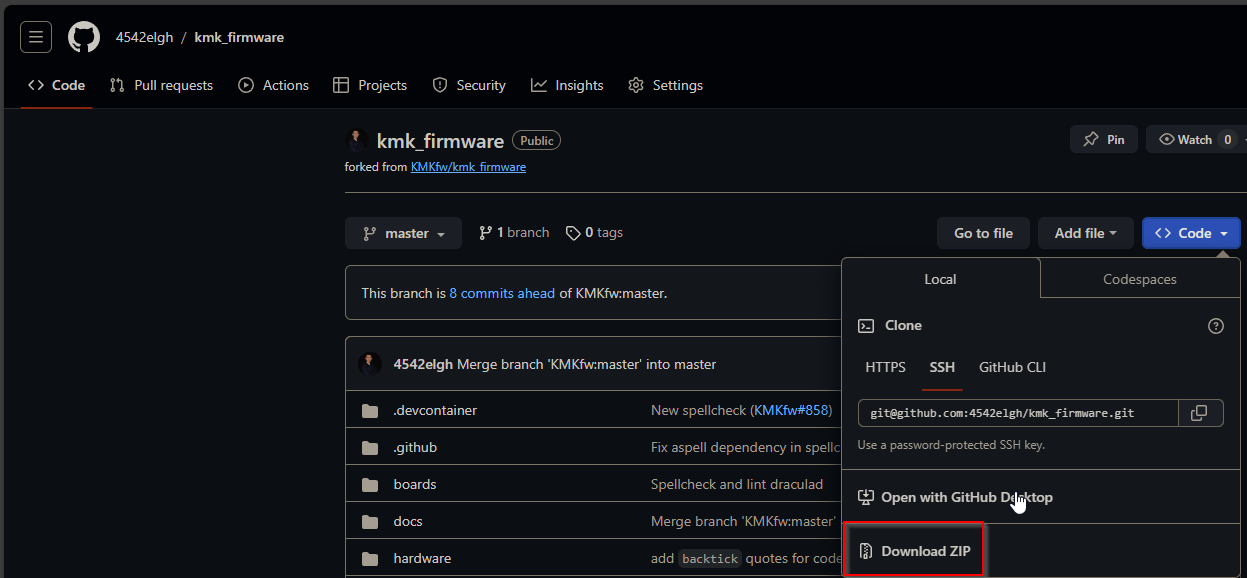
-
Extract
kmkfolder into CIRCUITPY drive root directory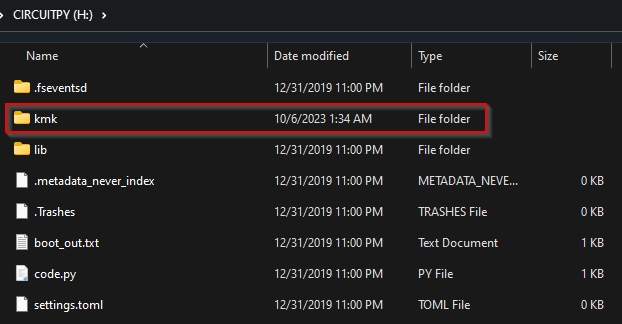
Add NeoPixel Library
Reprogram/disable NeoPixel (the white big LED in between Reset and Boot button)
 It require a new library download into
 CIRCUITPY Drive’s lib folder. If you do not have this folder, manually create it.
-
Download the NeoPixel library from CircuitPython NeoPixel and click on
Download Project Bundle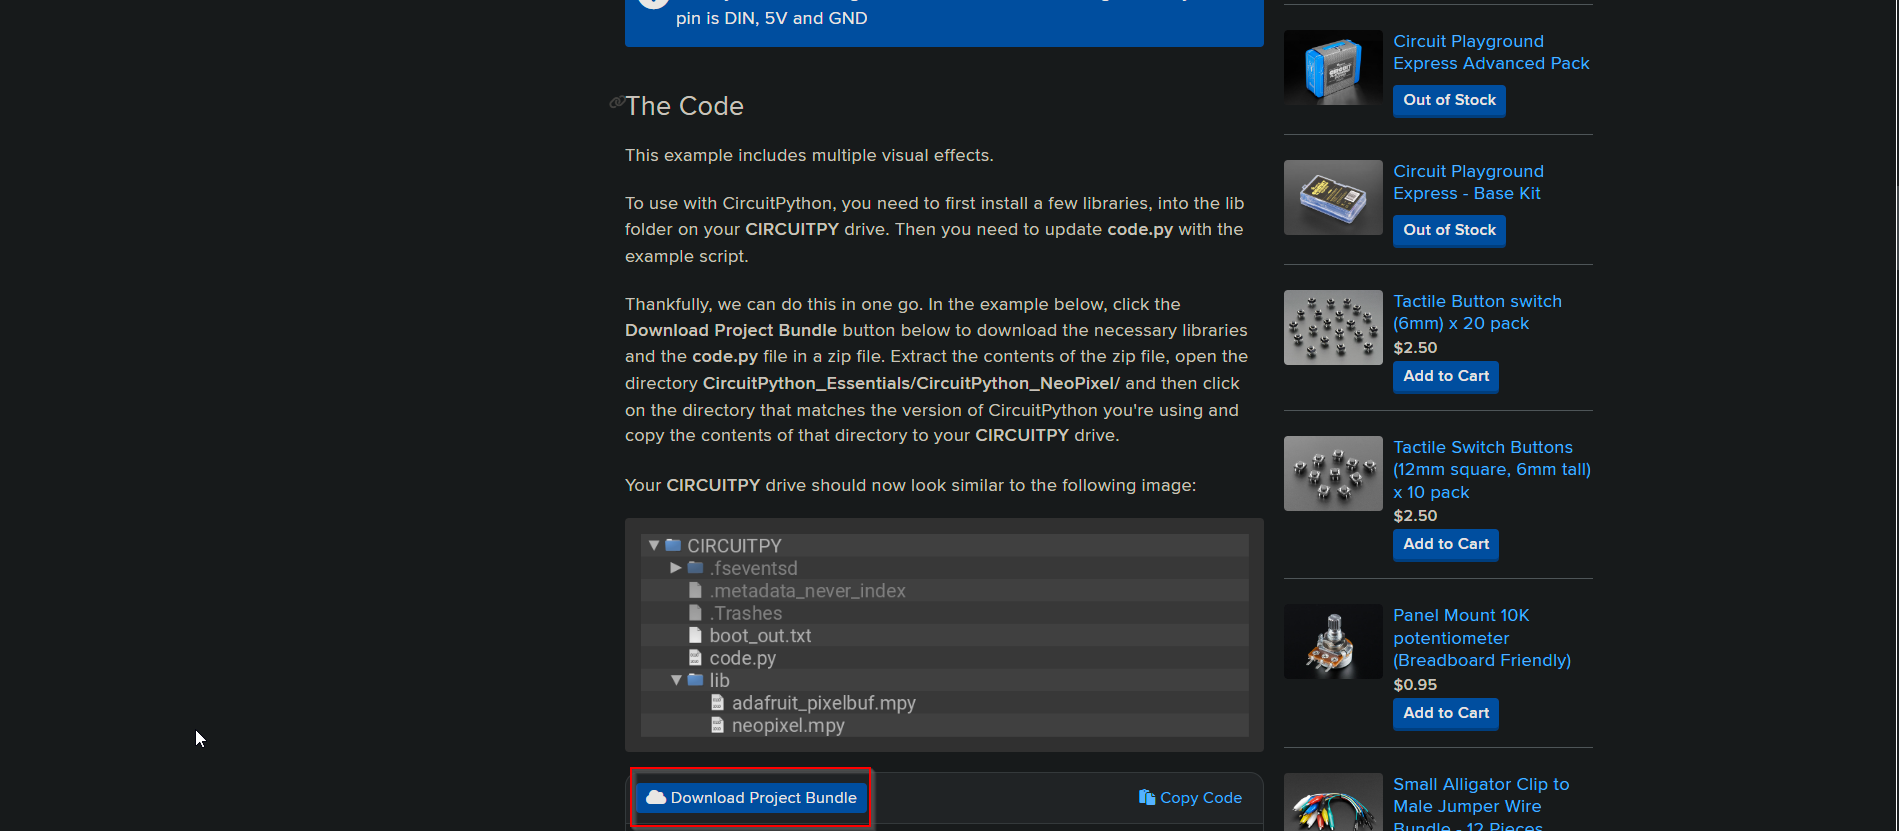
-
Then open the zip file and go all the way until you enter
libfolder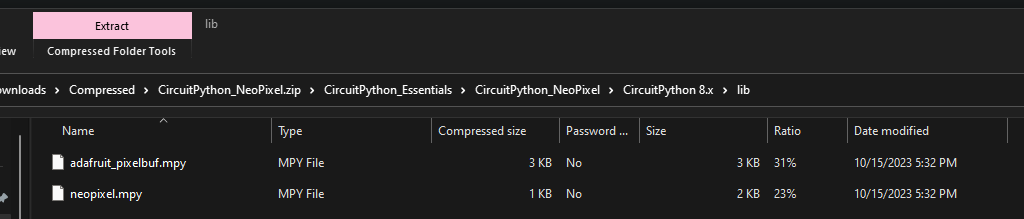
-
Copy the
neopixel.mpyand place it inside your CircuitPython Drive’slibfolder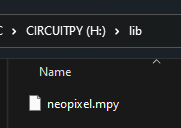
Editor
- Since this is python, you can use any text editor to edit
main.pyandkb.py(if your keyboard is diodeless) file, as long as it is not Office Word or any editor that add extra symbol at end of the file. - Read–eval–print loop (REPL) is only enabled/responsive when the program does not run accordingly. If you want to force REPL, comment out
keyboard.go()at the very end ofmain.pyto stop controller automatically going into loop mode.
MU Editor
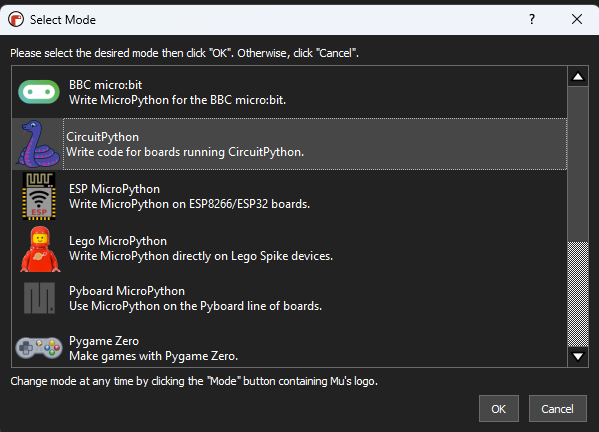
Mu Editor is supported by official CircuitPython documentation, it has a good enough editor for writing python code and it will also output error messages if it encounter any. This editor auto detect COM port number and connect to REPL.
-
Download MU Editor
-
Select CircuitPython on initial setup screen
-
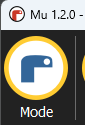
If you need to switch to another mode, you can switch via Mode button
-
Edit
main.pyandkb.py(if you are working with diodeless keyboard) on the CIRCUITPY drive and everything will be recognized, including KMK library
Putty
CircuitPython Official Doc for Putty serial port debugging: Advanced Serial Console on Windows
-
Install Putty
-
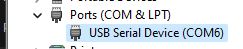
You will need to connect to microcontroller via COM port. You can find COM port from device manager.
-
Connect to REPL via Putty by using Serial mode, Speed is set to
115200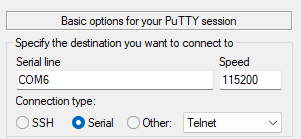
User configuration
If you want to work base on a clean template, there are a few in Github
KMK Diode setup (3x3 or 3x4 keyboard)
main.py
This is where all your keymapping is
- Create
main.pyfile - Import classes to help you with mapping:
# This is from CircuitPython, interacting with GPIO pins, also foundation of KMK
import board

# This is standard GPIO mapping for all matrix-like boards
from kmk.kmk_keyboard import KMKKeyboard

# Key Code are in this builtin class
from kmk.keys import KC- Import modules for more features
# Add Media key support
# http://kmkfw.io/docs/media_keys
from kmk.extensions.media_keys import MediaKeys

# Macro
# http://kmkfw.io/docs/sequences
from kmk.handlers.sequences import simple_key_sequence

# Unicode support
# http://kmkfw.io/docs/sequences#unicode
from kmk.handlers.sequences import unicode_string_sequence

# Rotary Encoder EC11 (Knob)
# http://kmkfw.io/docs/encoder
from kmk.modules.encoder import EncoderHandler

# Hold modifier with timeout (eg. Hold alt, and switch to Layer one for knob clicking tab tab tab)
# Use KC.HM(Modifier) to place a modifier on hold until timeout
from kmk.modules.holdmod import HoldMod- Standard KMKKeyboard instance with kb.py
# Initialize Keyboard class
keyboard = KMKKeyboard()
# I dont know what this means but use this value
keyboard.diode_orientation = DiodeOrientation.COL2ROW

# Define GPIO mapping
keyboard.col_pins = (board.D3, board.D2, board.D1, board.D0)
keyboard.row_pins = (board.D10, board.D6, board.D5, board.D4)- Set Unicode to Windows mode,
Windows only: need to install WinCompose
# Set Unicode to Windows mode
# WINDOWS NEEDS WINCOMPOSE INSTALLED BEFORE UNICODE TO WORK
keyboard.unicode_mode = UnicodeMode.WINC- Define and enable encoder, NOTE THE TRAILING COMMAS
# Regular GPIO Encoder
encoder_handler = EncoderHandler()
encoder_handler.pins = (
    # regular direction encoder and a button(define key in matrix)
    (board.D10, board.D9, None,), # encoder #1
)- Enable extension
# Enable extensions
keyboard.modules = [encoder_handler, Layers(), MediaKeys()]- Define Macro (a series of keys either simultaneously, or in sequence)
COPY = simple_key_sequence(
    (
        KC.LCTRL(no_release=True),
        KC.C
    )
)

CUT = simple_key_sequence(
    (
        KC.LCTRL(no_release=True),
        KC.X
    )
)

PASTE = simple_key_sequence(
    (
        KC.LCTRL(no_release=True),
        KC.V
    )
)

SCREENSHOT = simple_key_sequence(
    (
        KC.LGUI(no_release=True),
        KC.LSFT(no_release=True),
        KC.S
    )
)- Define Unicode
WINK = unicode_string_sequence('😉')
SHRUG = unicode_string_sequence('¯\_(ツ)_/¯')- Add Macros to your keymap
# Your Keymaps, a new line is a new row, a new list is a new layer
keyboard.keymap = [
    [KC.NO, COPY, CUT, KC.MUTE,# Each element represent a key on your keypad starting from upper left hand corner, adjust each row's length accordingly
    KC.N9, SCREENSHOT, WINK, SHRUG,
    KC.N5, KC.N6, KC.N7, KC.N8,
    KC.N1, KC.N2, KC.N3, KC.N4,
    ]
]-
Reprogram/Disable NEOPIEXL LED
# Disable LED light
import neopixel
led = neopixel.NeoPixel(board.NEOPIXEL, 1)
led.brightness = 0

# Breathing Layer status LED
from kmk.extensions.statusled_neopixel import statusLED
statusLED = statusLED(
    breath_mode=True,
    colors=(
    (255, 0, 0),
    (0, 255, 0),
    (0, 0, 255))
)- Enable keyboard and start listen to events
if __name__ == '__main__':
keyboard.go()- Save this file, and if you are in MU Editor, open REPL and see if any error is shown
main.py complete
# This is from CircuitPython, interacting with GPIO pins, also foundation of KMK
import board

# This is standard GPIO mapping for all matrix-like boards
from kmk.kmk_keyboard import KMKKeyboard

# Key Code are in this builtin class
from kmk.keys import KC

# Add Media key support
# http://kmkfw.io/docs/media_keys
from kmk.extensions.media_keys import MediaKeys

# Macro
# http://kmkfw.io/docs/sequences
from kmk.handlers.sequences import simple_key_sequence

# Unicode support
# http://kmkfw.io/docs/sequences#unicode
from kmk.handlers.sequences import unicode_string_sequence

# Rotary Encoder EC11 (Knob)
# http://kmkfw.io/docs/encoder
from kmk.modules.encoder import EncoderHandler

# Hold modifier with timeout (eg. Hold alt, and switch to Layer one for knob clicking tab tab tab)
# Use KC.HM(Modifier) to place a modifier on hold until timeout
from kmk.modules.holdmod import HoldMod

# Initialize Keyboard class
keyboard = KMKKeyboard()
# I dont know what this means but use this value
keyboard.diode_orientation = DiodeOrientation.COL2ROW

# Define GPIO mapping
keyboard.col_pins = (board.D3, board.D2, board.D1, board.D0)
keyboard.row_pins = (board.D10, board.D6, board.D5, board.D4)

# Set Unicode to Windows mode
# WINDOWS NEEDS WINCOMPOSE INSTALLED BEFORE UNICODE TO WORK
keyboard.unicode_mode = UnicodeMode.WINC

# Regular GPIO Encoder
encoder_handler = EncoderHandler()
encoder_handler.pins = (
    # regular direction encoder and a button(define key in matrix)
    (board.D10, board.D9, None,), # encoder #1
)

# Enable extensions
keyboard.modules = [encoder_handler, Layers(), MediaKeys()]

COPY = simple_key_sequence(
    (
        KC.LCTRL(no_release=True),
        KC.C
    )
)

CUT = simple_key_sequence(
    (
        KC.LCTRL(no_release=True),
        KC.X
    )
)

PASTE = simple_key_sequence(
    (
        KC.LCTRL(no_release=True),
        KC.V
    )
)

SCREENSHOT = simple_key_sequence(
    (
        KC.LGUI(no_release=True),
        KC.LSFT(no_release=True),
        KC.S
    )
)

WINK = unicode_string_sequence('😉')
SHRUG = unicode_string_sequence('¯\_(ツ)_/¯')

# Your Keymaps, a new line is a new row, a new list is a new layer
keyboard.keymap = [
    [KC.NO, COPY, CUT, KC.MUTE,# Each element represent a key on your keypad starting from upper left hand corner, adjust each row's length accordingly
    KC.N9, SCREENSHOT, WINK, SHRUG,
    KC.N5, KC.N6, KC.N7, KC.N8,
    KC.N1, KC.N2, KC.N3, KC.N4,
    ]
]

# Disable LED light
# import neopixel
# led = neopixel.NeoPixel(board.NEOPIXEL, 1)
# led.brightness = 0

# Breathing Layer status LED
from kmk.extensions.statusled_neopixel import statusLED
statusLED = statusLED(
    breath_mode=True,
    colors=(
    (255, 0, 0),
    (0, 255, 0),
    (0, 0, 255))
)

if __name__ == '__main__':
    keyboard.go()
KMK Diodeless setup (1x6 keyboard)
main.py
This is where all your keymapping is
- Create
main.pyfile - Import classes to help you with mapping:
# This is from CircuitPython, interacting with GPIO pins, also foundation of KMK
import board

# CUSTOM: This is custom GPIO mapping for this board specifically
from kb import PianoKB

# Key Code are in this builtin class
from kmk.keys import KC- Import modules for more features
# Add Media key support
# http://kmkfw.io/docs/media_keys
from kmk.extensions.media_keys import MediaKeys

# Macro
# http://kmkfw.io/docs/sequences
from kmk.handlers.sequences import simple_key_sequence

# Unicode support
# http://kmkfw.io/docs/sequences#unicode
from kmk.handlers.sequences import unicode_string_sequence

# Rotary Encoder EC11 (Knob)
# http://kmkfw.io/docs/encoder
from kmk.modules.encoder import EncoderHandler

# Hold modifier with timeout (eg. Hold alt, and switch to Layer one for knob clicking tab tab tab)
# Use KC.HM(Modifier) to place a modifier on hold until timeout
from kmk.modules.holdmod import HoldMod- Start A KMKKeyboard instance, either you create your own, or from existing library.
This is diodeless keyboard, you have to define your own layout and GPIO pins in kb.py
# Initialize custom GPIO mapping kb.py
keyboard = PianoKB()- Set Unicode to Windows, Windows only: need to install WinCompose
# Set Unicode to Windows mode
# WINDOWS NEEDS WINCOMPOSE INSTALLED BEFORE UNICODE TO WORK
keyboard.unicode_mode = UnicodeMode.WINC- Define and enable encoder
# Encoder, PINS are defined in kb.py
encoder_handler = EncoderHandler()- Enable extension
# Enable extensions
keyboard.modules = [encoder_handler, Layers(), MediaKeys()]- Define Macro (a series of keys either simultaneously, or in sequence)
COPY = simple_key_sequence(
    (
        KC.LCTRL(no_release=True),
        KC.C
    )
)

CUT = simple_key_sequence(
    (
        KC.LCTRL(no_release=True),
        KC.X
    )
)

PASTE = simple_key_sequence(
    (
        KC.LCTRL(no_release=True),
        KC.V
    )
)

SCREENSHOT = simple_key_sequence(
    (
        KC.LGUI(no_release=True),
        KC.LSFT(no_release=True),
        KC.S
    )
)- Define Unicode
WINK = unicode_string_sequence('😉')
SHRUG = unicode_string_sequence('¯\_(ツ)_/¯')- Add Macros to your keymap
# Your Keymaps, a new line is a new row, a new list is a new layer
keyboard.keymap = [
    [KC.NO, COPY, CUT, KC.MUTE,# Each element represent a key on your keypad starting from upper left hand corner, adjust each row's length accordingly
    KC.N9, SCREENSHOT, WINK, SHRUG,
    KC.N5, KC.N6, KC.N7, KC.N8,
    KC.N1, KC.N2, KC.N3, KC.N4,
    ]
]-
Reprogram/Disable NEOPIEXL LED
# Disable LED light
import neopixel
led = neopixel.NeoPixel(board.NEOPIXEL, 1)
led.brightness = 0

# Breathing Layer status LED
from kmk.extensions.statusled_neopixel import statusLED
statusLED = statusLED(
    breath_mode=True,
    colors=(
    (255, 0, 0),
    (0, 255, 0),
    (0, 0, 255))
)- Enable keyboard and start listen to events
if __name__ == '__main__':
keyboard.go()- Save this file, and if you are in MU Editor, open REPL and see if any error is shown
main.py complete
# This is from CircuitPython, interacting with GPIO pins, also foundation of KMK
import board

# CUSTOM: This is custom GPIO mapping for this board specifically
from kb import PianoKB

# Key Code are in this builtin class
from kmk.keys import KC

# Add Media key support
# http://kmkfw.io/docs/media_keys
from kmk.extensions.media_keys import MediaKeys

# Macro
# http://kmkfw.io/docs/sequences
from kmk.handlers.sequences import simple_key_sequence

# Unicode support
# http://kmkfw.io/docs/sequences#unicode
from kmk.handlers.sequences import unicode_string_sequence

# Rotary Encoder EC11 (Knob)
# http://kmkfw.io/docs/encoder
from kmk.modules.encoder import EncoderHandler

# Hold modifier with timeout (eg. Hold alt, and switch to Layer one for knob clicking tab tab tab)
# Use KC.HM(Modifier) to place a modifier on hold until timeout
from kmk.modules.holdmod import HoldMod

# Initialize custom GPIO mapping kb.py
keyboard = PianoKB()

# Set Unicode to Windows mode
# WINDOWS NEEDS WINCOMPOSE INSTALLED BEFORE UNICODE TO WORK
keyboard.unicode_mode = UnicodeMode.WINC

# Encoder, PINS are defined in kb.py
encoder_handler = EncoderHandler()

# Enable extensions
keyboard.modules = [encoder_handler, Layers(), MediaKeys()]

COPY = simple_key_sequence(
    (
        KC.LCTRL(no_release=True),
        KC.C
    )
)

CUT = simple_key_sequence(
    (
        KC.LCTRL(no_release=True),
        KC.X
    )
)

PASTE = simple_key_sequence(
    (
        KC.LCTRL(no_release=True),
        KC.V
    )
)

SCREENSHOT = simple_key_sequence(
    (
        KC.LGUI(no_release=True),
        KC.LSFT(no_release=True),
        KC.S
    )
)

WINK = unicode_string_sequence('😉')
SHRUG = unicode_string_sequence('¯\_(ツ)_/¯')

# Your Keymaps, a new line is a new row, a new list is a new layer
keyboard.keymap = [
    [KC.NO, COPY, CUT, KC.MUTE,# Each element represent a key on your keypad starting from upper left hand corner, adjust each row's length accordingly
    KC.N9, SCREENSHOT, WINK, SHRUG,
    KC.N5, KC.N6, KC.N7, KC.N8,
    KC.N1, KC.N2, KC.N3, KC.N4,
    ]
]

# Disable LED light
import neopixel
led = neopixel.NeoPixel(board.NEOPIXEL, 1)
led.brightness = 0

# Breathing Layer status LED
from kmk.extensions.statusled_neopixel import statusLED
statusLED = statusLED(
    breath_mode=True,
    colors=(
    (255, 0, 0),
    (0, 255, 0),
    (0, 0, 255))
)

if __name__ == '__main__':
    keyboard.go()
kb.py
This is where you map each switch to microcontroller pins. If you are building a custom board, take a look at Github zip file’s boards folder, if a board with your controller and PCB layout has been created already. Dont re-invent the wheel.
Since we are doing custom PCB and with a fairly new controller XIAO RP2040, we will need to define our own kb.py file
It is strongly recommended that you analyze the schematic of your board in order to map the correct GPIO pin
- Create a
kb.pyfile - Import classes to help you with mapping:
# Required CircuitPython dependency
import board
# KMK base class
from kmk.kmk_keyboard import KMKKeyboard
# Direct GPIO mapping
from kmk.scanners.keypad import KeysScanner
# Rotary Encoder
from kmk.scanners.encoder import RotaryioEncoder- Define your own keyboard class, this class can be any name but need to inherit
KMKKeyboardbase class.
- This class should have a constructor and have scanners (GPIO mapping extension)
class PianoKB(KMKKeyboard):
def __init__(self):- Define your GPIO pins
- You can find GPIO pins layout from
import board
dir(board)
- KeysScanner is direct mapping of GPIO pin, this scanner does not need diode RotaryioEncoder is also a direct mapping to GPIO pin but for Rotary Encoder
# create and register the scanner
self.matrix = [
	KeysScanner(
		# require argument:
		pins=[board.D0, board.D1, board.D2, board.D3, board.D4, board.D5, board.D6],
		# optional arguments with defaults:
		# value_when_pressed=False,
		# pull=True,
		# interval=0.02,  # Debounce time in floating point seconds
		# max_events=64
	),
	RotaryioEncoder(
		pin_a=board.D10,
		pin_b=board.D9,
		# optional
		# divisor=4,
	)
]- Keymap Coordinates, this defines your keyboard physical layout
KMKKeyboard.coord_mapping = [0, 1, 2, 3, 4, 5, 6, 7]kb.py complete
This is for PianoPad since every pin is directly map to a pin on XIAO RP2040
import board
from kmk.kmk_keyboard import KMKKeyboard
from kmk.scanners.keypad import KeysScanner
from kmk.scanners.encoder import RotaryioEncoder

class PianoKB(KMKKeyboard):
    def __init__(self):
        self.matrix = [
            KeysScanner(
                pins=[board.D0, board.D1, board.D2, board.D3, board.D4, board.D5, board.D6],
            ),
            RotaryioEncoder(
                pin_a=board.D10,
                pin_b=board.D9,
            )
        ]
        KMKKeyboard.coord_mapping = [0, 1, 2, 3, 4, 5, 6, 7]